Run the Game#
Start the packaged game with the menu or with options, drive to a field, and find the logs of the session.
Before you start
- Build the packaged game (Build the Game).
- Run the commands in the repository root.
- Keep 500 MB of the disk free for a session with sensors. A session writes approximately 10 MB each second.
Caution
Run only one game at a time. Two games can use all the memory of the GPU.

Start with the Menu#
-
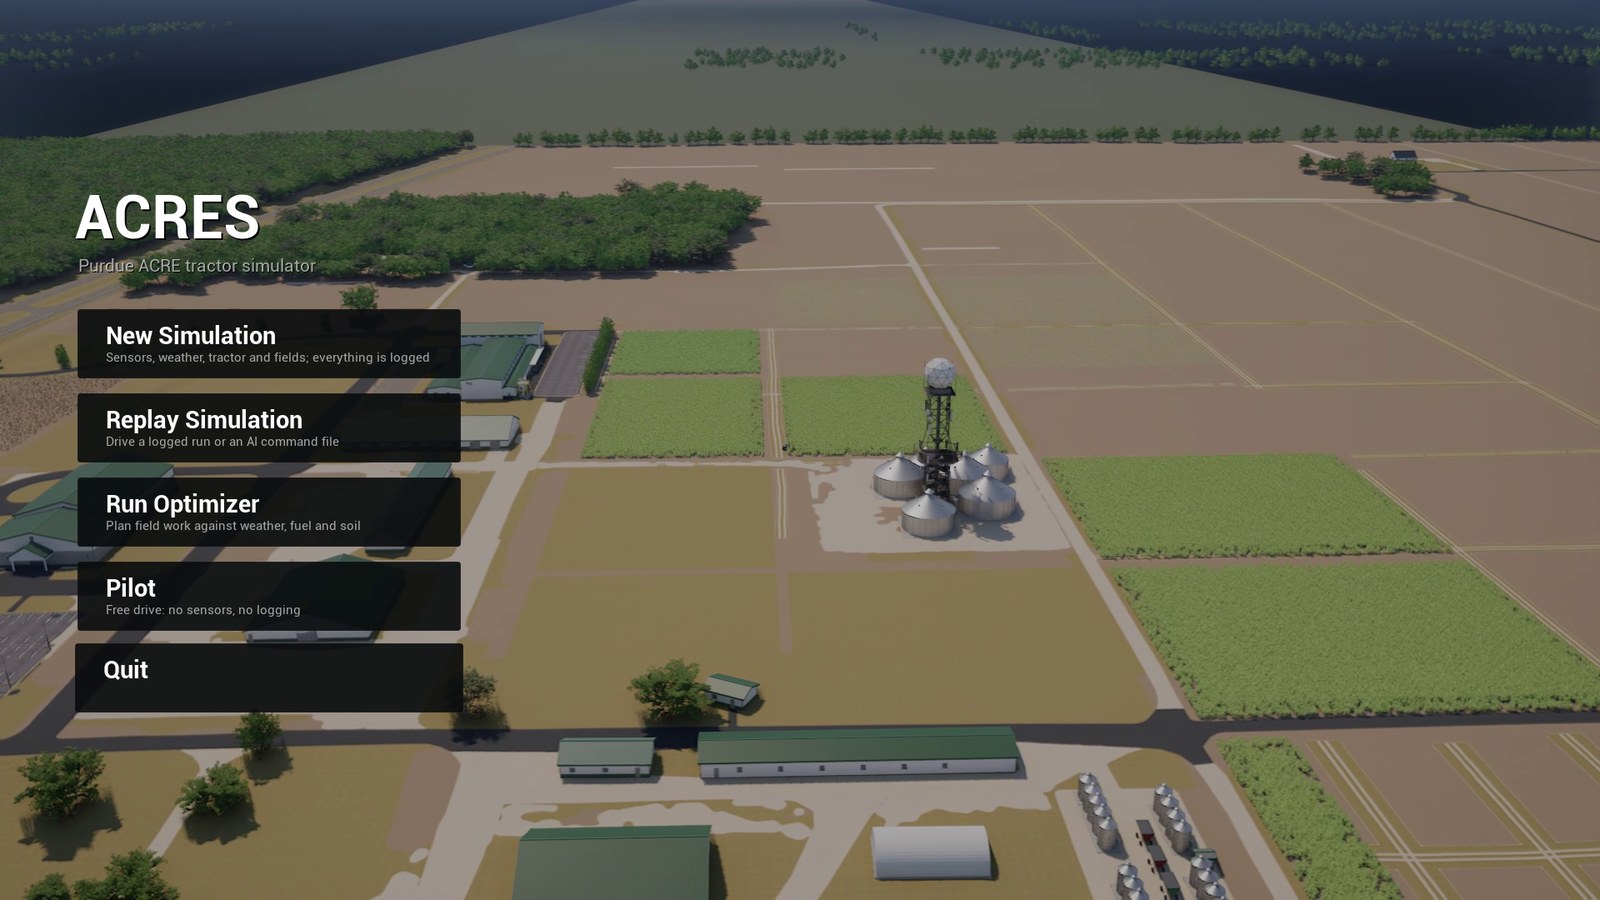
Start the game without options.
Expected result
The game shows the menu above a slow flight over the farm.
-
Select New Simulation.
Expected result
The game shows the tabs of the session. The line above the buttons shows
Configuration is physically consistent.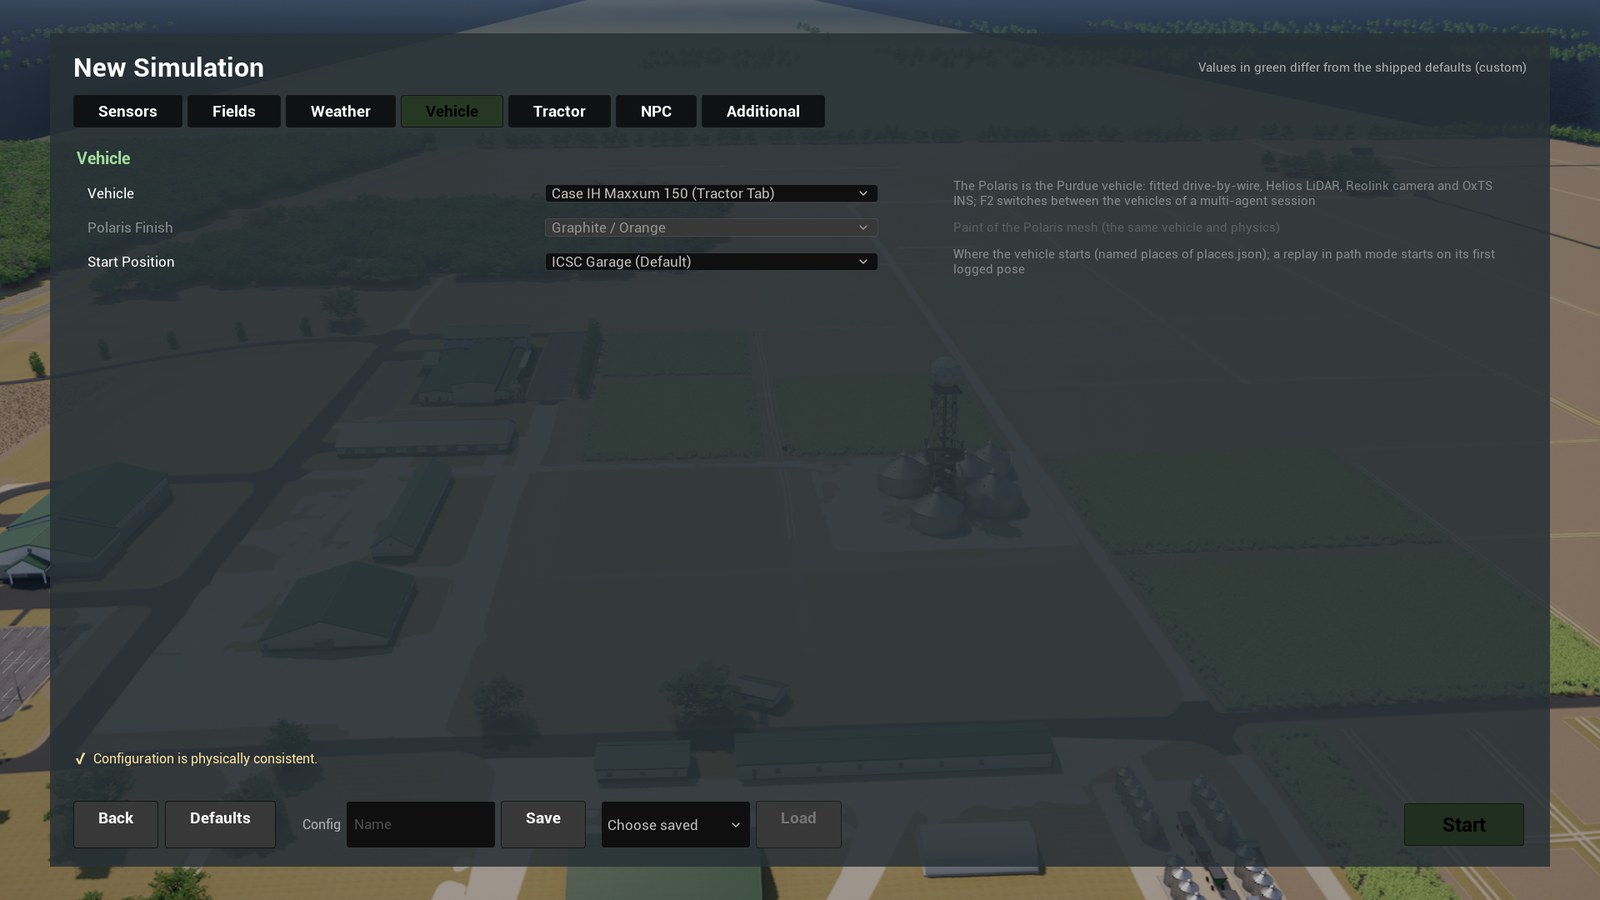
-
Keep the default values, or change the settings on the tabs.
Tab Settings Sensors The camera, the LiDAR, the GNSS, the IMU and the CAN bus: on or off, rates, noise, delay and seed. Fields The crop, the soil and the start wetness of each field. The terrain brush. Weather The temperature, the wind, the sky and the rain. Vehicle The Maxxum, the Polaris or the two together, the paint of the Polaris and the start position. Tractor The chassis, the tires, the engine, the drivetrain, the steering and the implement of the Maxxum. NPC The farm traffic and the farm workers. Additional The clock, the crop season, the render tier and the random seed. The menu shows a value in green when it is different from the default. The menu also compares each value with physical limits. Start is not available when a value has an error.
-
Select Start.
Expected result
The map loads again. The Maxxum is in front of the ICSC garage. A box with the title
Controlsshows the most important keys for 12 s.
| Button | Session |
|---|---|
| New Simulation | A session with sensor recording and a session log. |
| Replay Simulation | A session that drives a logged session or a command file again. |
| Run Optimizer | A plan of field work. No session starts. |
| Pilot | A session without sensors and without logs. |
| Quit | Stop the game. |
Drive to a Field#
-
Hold W to move forward. Push A and D to steer.
Caution
Steer around the parking row behind ICSC. It is 14 m in front of the start position. Its wheel stops, its lamp pole and its parked cars stop the vehicle.
-
Push ] to select a higher gear and [ to select a lower gear.
- Move the mouse to turn the camera. Turn the mouse wheel to move the camera nearer or farther.
-
Drive to a field. The site map at the bottom left shows the fields with their numbers and the vehicle as an orange arrow.
Expected result
The number of the field shows above the map for some seconds, for example
Field F53. The tires sink into the soil and the wheel slip increases. -
Hold Tab to see all keys. Keyboard and Mouse Controls gives each key.
Read the HUD#
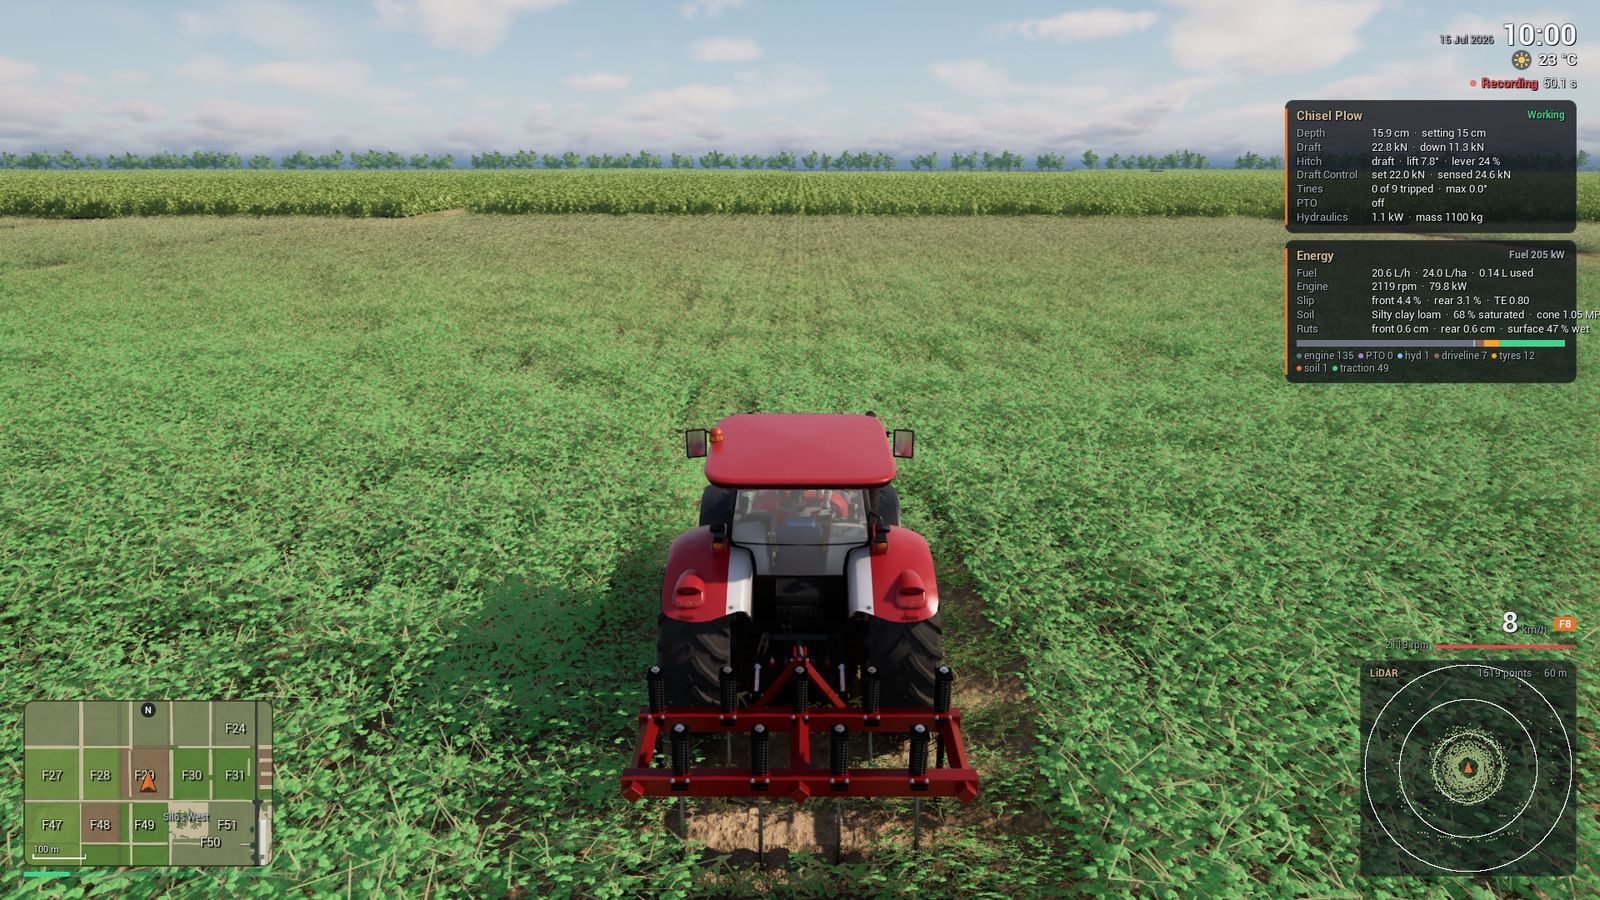
The HUD shows information only when it is necessary.
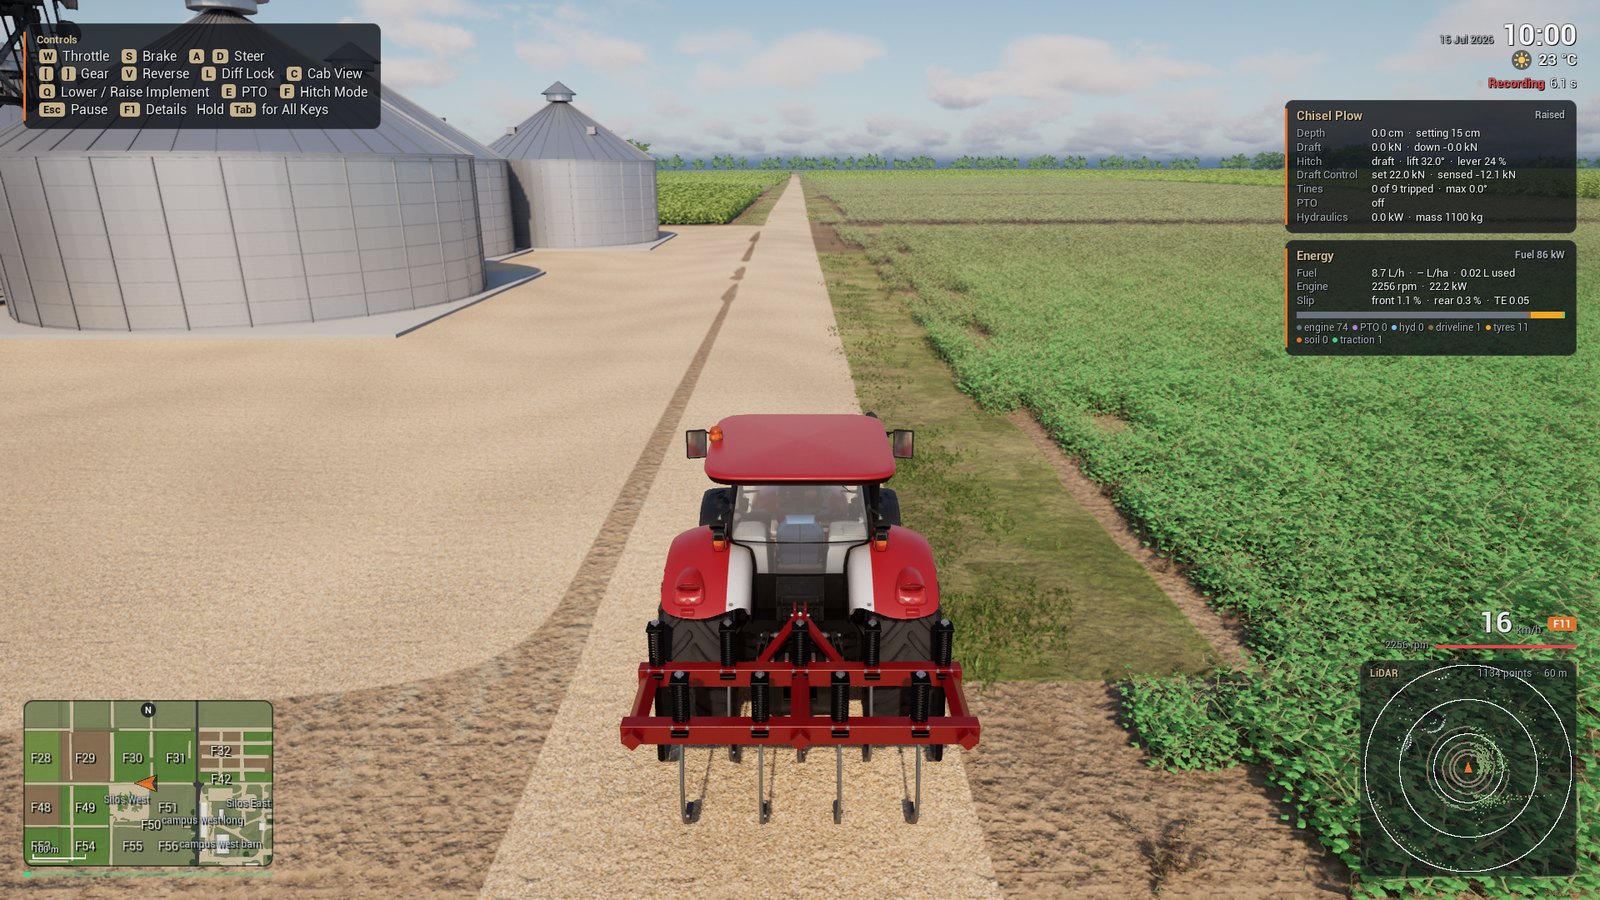
| Area | Content |
|---|---|
| Top left | The keys for the first 12 s. Hints, for example for the differential lock. Safety alerts. |
| Top right | The date, the clock and the weather. Below them, Recording with the time of the sensor episode. |
| Right | The implement card and the energy card: depth, draft, hitch, fuel flow, engine speed and wheel slip. Push I to hide them. |
| Bottom left | The site map with the field numbers, the north mark and a scale of 100 m. The bar below it shows the wheel slip. |
| Bottom right | The speed in km/h, the gear and the engine speed. During a recording, the LiDAR card shows the last scan from above. |
End the Session#
-
Push Esc.
Expected result
The game shows
Pausedwith the buttons Resume, End Simulation and Quit. -
Select End Simulation.
Expected result
The game closes the logs and shows the menu again.
-
Select Quit.
-
List the sessions. The name of a session folder has the date, the time and the mode.
-
Read the summary of the session.
Start a Session without the Menu#
The option -VehicleDemo starts a session directly. Other options set the vehicle, the map, the place and the logs.
-
Start a session at the default start position.
-
Add options for a different session.
| Option | Function |
|---|---|
-Vehicle=polaris |
Start the Polaris. The default is the Maxxum. |
-Vehicles=maxxum,polaris |
Start the two vehicles in one session. Push F2 to go to the next vehicle. |
-Implement=chisel_plow |
Attach an implement to the Maxxum. |
-MapData=acre-mixed |
Use a map variant by its name. The names are the folders of Acres/Content/SimulationMaps. |
-SpawnAt=spawn-beck-lot |
Start at a place of the file places.json. |
-SessionLog |
Write the session log. |
-SensorRecord |
Record the sensors. |
-VehicleOutput= |
Set the session folder. Give an absolute path. |
Command-Line Options gives all options. Configure a Session gives the settings of the map, the weather, the vehicles and the sensors.
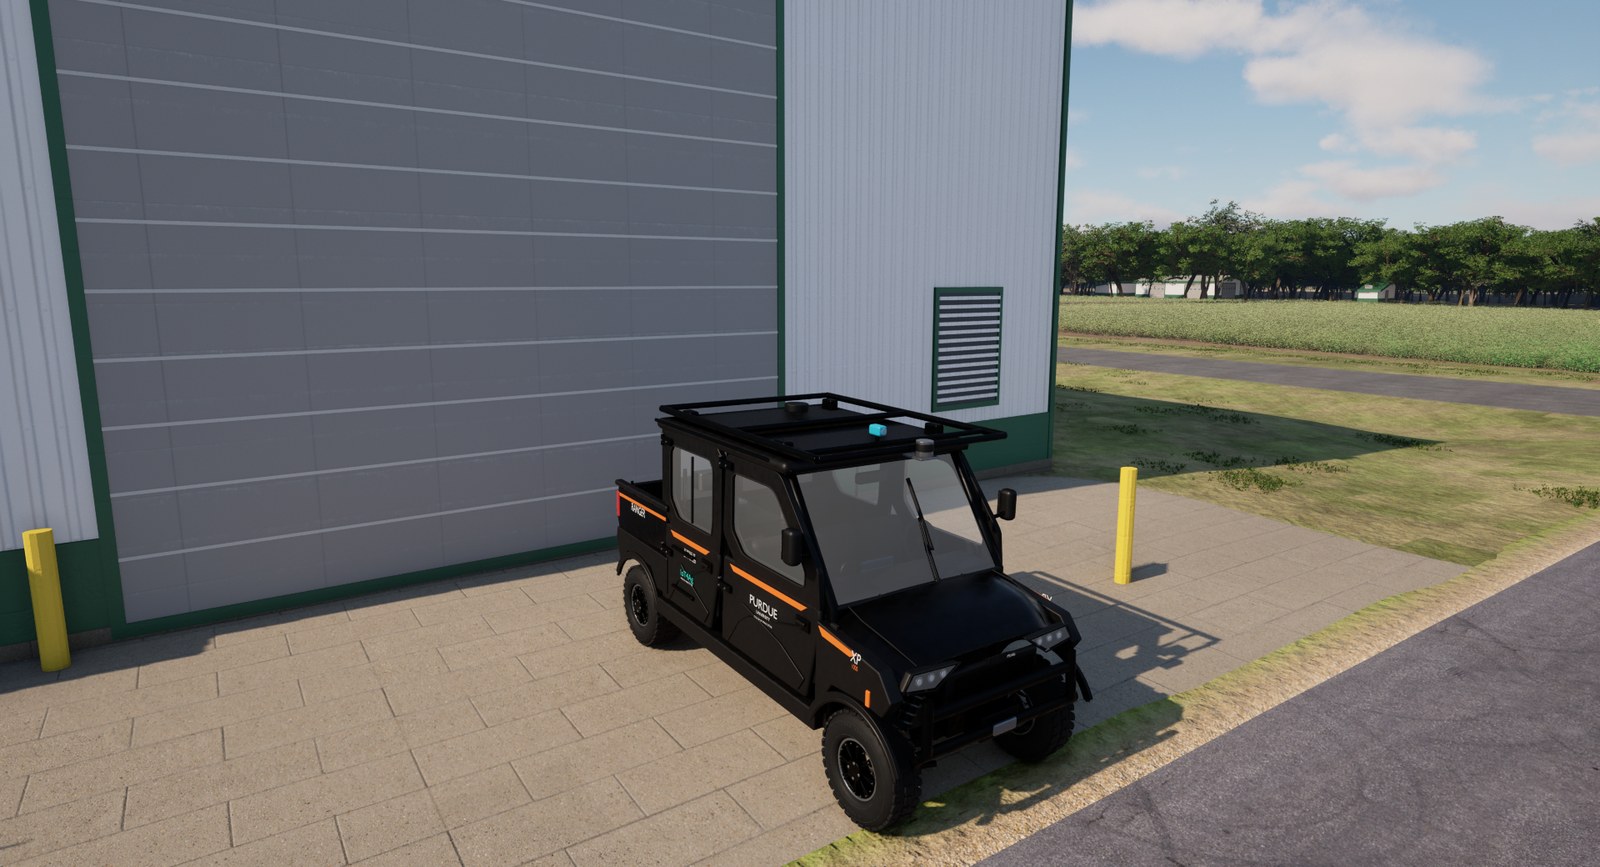
Run without a Window#
The option -RenderOffscreen renders the game without a window, for example on a computer without a desktop.
-
Start a session without a window and stop it after 60 s.
-
Examine the log.
Without a window, the game does not use -ResX= and -ResY=.
Add -windowed -ForceRes -ResX=1920 -ResY=1080 to get a view of 1920 x 1080 pixels for screenshots.
Find the Logs#
| Output | Location |
|---|---|
| The log of the game | The terminal and Packaged/Linux/Acres/Saved/Logs/Acres.log |
| The session folder of a menu session | Packaged/Linux/Acres/Saved/Sessions/<date>-<time>-<mode> |
| The session folder of a direct session | The folder of -VehicleOutput=. The default is Packaged/Linux/Acres/Saved/Vehicle. |
| Saved menu configurations | Packaged/Linux/Acres/Saved/Configs/<name>.json |
The game writes a line with the prefix ACRES_ at each important event. Use these lines in scripts.
| Log Marker | Event |
|---|---|
ACRES_RENDER_TIER |
The game selected the render tier. The line gives the GPU memory and the sensor profile. |
ACRES_MAP_DATA |
The game uses a map variant. The line gives its folder and the fields that are different. |
ACRES_SPAWN |
The vehicle got its start pose. |
ACRES_ENVIRONMENT_READY, ACRES_FARM_READY |
The weather and the farm are ready. |
ACRES_VEHICLE_READY |
One vehicle is ready. |
ACRES_SENSOR_START, ACRES_SENSOR_STOP |
A sensor episode started or stopped. The stop line gives the counts. |
ACRES_SIM_CONTROL_READY |
The simulator control channel is open. |
ACRES_CAPTURE_START, ACRES_CAPTURE_DONE |
The video recording started or stopped. |
Session Log gives the files of a session folder.
Stop the Game#
| Situation | Procedure |
|---|---|
| The menu | Select Quit. |
| A session that the menu started | Push Esc. Select End Simulation or Quit. |
| A session that the command line started | Push Esc. |
| A session without a window | Push Ctrl+C one time, or use timeout -s INT. |
Warning
Push Ctrl+C one time only, then wait. A second interrupt stops the game immediately.
The game then does not write session-summary.json and the farm files, and the sensor episode stays open.
Record a Video#
The game can record its view with the HUD into an MP4 file. The recording does not need a desktop.
-
Start a session with the video options. Give an absolute path for the file.
| Option | Default | Function |
|---|---|---|
-CaptureVideo= |
The MP4 file. The option starts the recording. | |
-CaptureSeconds= |
no limit | Stop the game after this recording time. |
-CaptureFps= |
30 | The frame rate of the file, from 1 to 120. |
-CaptureSize= |
the size of the view | The size of the video, for example 1280x720. |
-CaptureCodec= |
automatic | One encoder: h264_nvenc, libx264, libopenh264 or mpeg4. |
The video is not a sensor recording. Collect Data gives the camera images and the LiDAR scans.
Render Tiers and Sensor Profiles#
The game selects a render tier one time, at the start of a session.
- The game reads the dedicated GPU memory.
- With 11 776 MiB or more, the tier is
high. With less memory, the tier islow. - The option
-RenderTier=lowor-RenderTier=highreplaces the selection. The menu setting Render Quality on the tab Additional does the same.
The log shows the result:
ACRES_RENDER_TIER tier=high vram_mb=16311 source=auto screen_percentage=100 pinned=0 sensor_profile=calibrated
| Setting | Low Tier | High Tier |
|---|---|---|
Main view resolution (r.ScreenPercentage) |
60 %, then temporal super-resolution | 100 % |
| Global illumination and reflections | 1 | 3 |
| Shadows, anti-aliasing, post process, effects | 2 | 3 |
r.LumenScene.SurfaceCache.AtlasSize |
2048 | 8192 |
r.Streaming.PoolSize (MiB) |
2048 | 3072 |
r.Shadow.Virtual.MaxPhysicalPages |
2048 | 4096 |
Acres/Source/Acres/AcresRenderTier.cpp gives all settings of each tier.
Sensor Profiles#
The camera image and the GPU LiDAR change with the render state. While a camera or a LiDAR records, the game thus pins the render state to a sensor profile. When the last recorder stops, the render state of the tier comes back.
| Sensor Profile | Tier | Difference from calibrated |
|---|---|---|
calibrated |
High | None. The validation of the Polaris camera and LiDAR uses this profile. |
reduced-6gb |
Low | Smaller surface cache, radiance cache, streaming pool and shadow pages, for a GPU with 6 GB. |
The option -SensorRenderProfile=calibrated uses the calibrated profile on the low tier. The option -SensorRenderProfile=reduced uses the reduced profile on the high tier.
Each dataset has the label sensor_profile:
| Label | Condition |
|---|---|
polaris-calibrated |
The Polaris sensors with the profile calibrated |
polaris-reduced-6gb, tractor-default-reduced-6gb |
The profile reduced-6gb |
tractor-default |
The sensors of the Maxxum with the profile calibrated |
custom |
A sensor setting or a pinned render setting is different from the shipped files |
The CPU LiDAR#
The GPU LiDAR needs hardware ray tracing with inline ray queries.
Without them, the game uses the CPU LiDAR with collision geometry and simple shapes for crops and tree crowns.
The option -SensorCpuLidar selects the CPU LiDAR on all computers.
The line ACRES_SENSOR_START shows gpu_lidar=1 or gpu_lidar=0.
Next Steps#
-
All keys of the game.
-
Map, weather, soil, time, vehicles and sensors.
-
Record the sensors and read the files.